
Let’s face it — nobody wants to fight with a mic stand mid-performance. One minute you’re belting your heart out, and the next, the mic’s slowly sinking like a deflating balloon. Frustrating, right? But here’s the thing — most of those struggles come down to improper setup and adjustments.
Whether you’re gigging across town, streaming from your bedroom, or recording your next hit, knowing how to handle your mic stand can make a world of difference. No fancy degree in “Standology” required — just a few practical tips.
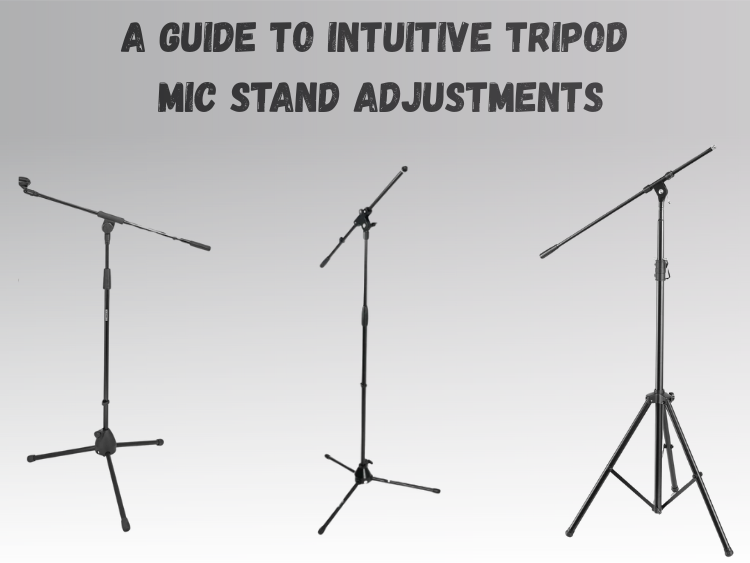
Tripod, Boom, or Round Base — What’s Your Type?
Before we get into the tweaks, let’s talk about mic stand types. They’re like shoes — the right one depends on the occasion.
- Tripod Stands — The all-rounder. Sturdy, adjustable, and great for musicians who like to move around. If you’re switching between standing and sitting, this one’s got your back.
- Boom Arm Stands — Perfect for podcasters, drummers, or anyone who needs flexibility. Need that mic closer without it cramping your style? Boom arms are like your helpful, invisible stagehand.
- Round Base Stands — Think of these as the “steady as a rock” option. Great for speeches or gigs where you don’t want your stand sliding across the stage like it’s on ice.
Setting Up for Success
Got your mic stand? Cool. Now, don’t just slap it together and hope for the best. A few quick checks can save you from a mid-set disaster.
- Level It Out: Uneven floors? Adjust the tripod legs or find a stable spot. Avoid that “Leaning Tower of Pisa” look.
- Inspect the Knobs: Give everything a quick twist. Loose knobs = wobbly mic.
- Height First: Adjust the main pole to about chest level. You’ll tweak from there, but this is a solid starting point.
- Give It a Shake: Not a wild one — just a gentle nudge to check for stability. If it wobbles like a nervous puppy, adjust.
Boom Arm Bliss — Getting That Perfect Angle
Boom arms are basically the Swiss Army knives of mic stands. Need to pull the mic closer or slide it out of the way? Easy.
- Angle Smart: Around 45 degrees works for most performances. You get a clear voice capture without blocking your face from the crowd.
- Distance Matters: About 6-12 inches from your mouth is the sweet spot. Closer than that? You risk those breathy Darth Vader sounds. Too far? Your audience might only hear the drummer.
- No Sagging Allowed: If the boom keeps drooping, first check if the mic’s too heavy for your stand. If not, tighten that adjustment knob.
Mic Clip or Shock Mount — Keep It Secure
Your mic deserves a solid spot to chill. No one wants to hear the thunk of a mic hitting the floor mid-gig.
- Clip for the Basics: Most dynamic mics fit snugly in a standard mic clip. Slide it in, tighten it, and you’re good to go.
- Shock Mount for the Pros: Condenser mics? They’re sensitive souls. A shock mount will cushion vibrations from stomping feet or rogue drumbeats.
- Angle It Right: A slight upward tilt helps capture vocals more naturally. Straight on can get harsh, and pointing it down? That’s just insulting.
Height Adjustment — Because Hunching Isn’t a Vibe
Ever seen a performer hunched over a mic like they’re spilling a secret? Not the best look. Whether you’re standing tall or rocking from a stool, the mic should meet you, not the other way around.
- Find the Knob: Usually around the middle of the pole. Twist counterclockwise to loosen it.
- Adjust to Fit: For standing, aim to have the mic right at mouth level. Sitting? Just below your mouth works best.
- Lock It Down: Tighten the knob — but don’t go full Hulk on it. Firm is enough.
Bonus tip: Singers who move a lot might prefer leaving the knob slightly looser for quick mid-song tweaks. Just don’t loosen it to the point where the mic nosedives.
Tidy Cables = Fewer Faceplants
Look, nobody wants to be the person who trips on their own mic cable. It’s not punk rock, it’s just embarrassing.
- Wrap It Up: Run the cable down the stand, securing it with clips or Velcro ties. Bonus points for making it look neat.
Leave a Little Slack: Your mic needs some freedom to move without yanking your stand. Think of it like a leash — not too tight. - Ground Control: Got extra cable? Coil it in a figure-eight on the floor. No cable spaghetti here.
Troubleshooting: When Your Stand Has a Mind of Its Own
Even the best stands act up sometimes. Here’s how to handle it:
- Boom Arm Sagging? Check the weight limit. Too much mic for your stand? Swap for a sturdier one.
Mic Drifting? Re-tighten the joints and check if the mic clip is loose. Sometimes a simple adjustment fixes the problem. - Wobbly Stand? Move it to a flat surface or adjust the tripod legs. If that doesn’t work, sandbags are your friend.
Final Thoughts: Make It Yours
Adjusting a mic stand isn’t rocket science, but getting it just right? That’s a game-changer. When your setup feels natural, your performance will too.
And hey, if you’re looking for a stand that won’t quit on you mid-gig, check out 5 Core’s adjustable tripod mic stands. Built to last, easy to adjust, and sturdy enough for even the rowdiest performances. No drama, just rock-solid support.
Now go on — set up, tweak, and let that mic stand work for you.