

A mic stand isn’t just a holder—it’s a tool that shapes your sound. Whether you’re a vocalist, guitarist, or drummer, positioning your mic right can make all the difference. The wrong height or angle? You risk muffled sounds, awkward posture, and missed notes.
Instead of spending extra on new gear, mastering mic stand adjustments helps you get more out of what you already own. From standing performances to seated sessions and dynamic setups, small tweaks can refine your sound and performance.
Want clearer vocals, better instrument pickup, or effortless transitions during live shows? Understanding how to adjust your mic stand can give you exactly that—without spending a dime. Let’s dive into how you can make the most of your setup.
Tips to Adjust Your Microphone Stand
Standard Upright Position (For Standing Performances)
For vocalists, announcers, and solo performers, proper mic height and angle directly impact sound quality and comfort. An improperly placed mic can force you to hunch or strain, affecting both posture and vocal projection.
How to Adjust:
- Set the Height: Loosen the adjustment knob and raise or lower the stand so the mic aligns with your mouth when standing naturally. Avoid positioning it too high or low, as this can affect sound clarity.
- Adjust the Angle: Tilt the mic slightly upward to minimize plosive sounds (like “P” and “B” bursts) and prevent breath noise from distorting the audio.
- Maintain Proper Distance: Keep the mic 6–12 inches away to balance clarity and avoid distortion. Closer placement enhances warmth, while a bit more distance captures a fuller sound.
Low Positioning (For Seated Performances & Instruments)
Singers, acoustic guitarists, podcasters, and drummers often perform while seated, requiring a lower mic stand setup. Placing the mic too high or too far can weaken sound pickup and force awkward posture adjustments.
How to Adjust:
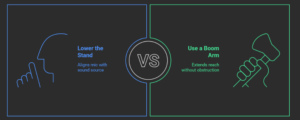
- Lower the Stand: Adjust the height so the mic aligns with your mouth or instrument’s sound source. For vocalists, it should be level with the lips when sitting upright.
- Use a Boom Arm (If Available): A boom arm helps extend reach without requiring the stand to be directly in front of you, preventing obstruction.
- Angle the Mic Properly: Position it slightly downward for vocals to reduce background noise or point it towards the guitar’s sound hole for optimal acoustic capture.
Overhead & Hanging Setup (For Drum Kits & Choirs)
Overhead mic placement is essential for capturing full, balanced sound from drum kits, choirs, and large ensembles. Positioning too low can result in uneven sound pickup, while improper angles may introduce unwanted noise.
How to Adjust:
- Raise the Stand: Extend the stand high enough to cover a broad sound area, typically 2–3 feet above the source for overhead drum mics or choir recordings.
- Use Boom Extensions: A boom arm can help position the mic above the sound source without taking up extra floor space if a standard stand isn’t tall enough.
- Angle for Balance: Tilt the mic slightly downward to capture a natural mix of direct and ambient sound. Avoid extreme angles that may create phase issues.
- Ensure Stability: Heavier stands or counterweights prevent tipping, especially when using extended booms.
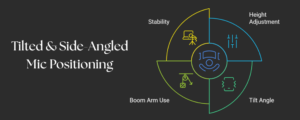
Tilted & Side-Angled Positioning (For Dynamic Movement)
Musicians who move while performing—such as guitarists, saxophonists, or vocalists who also play an instrument—benefit from a tilted or side-angled mic setup. This allows freedom of movement without sacrificing sound quality.
How to Adjust:
- Set the Height First: Position the stand so the mic is slightly below your mouth or instrument, angled upwards for optimal pickup.
- Tilt for Flexibility: Adjust the mic to a 45-degree angle to accommodate movement while maintaining consistent sound capture.
- Use a Boom Arm if Needed: A side-positioned boom arm lets you keep the mic close without standing directly in front of it, reducing obstructions.
- Secure the Base: Heavier stands or weighted bases prevent tipping when adjusting the angle, ensuring stability during performances.
Quick Adjustments for Live Performances
Live performances require fast mic stand adjustments to accommodate multiple users or changing setups. Wasting time adjusting a stand mid-show can disrupt the flow and affect sound quality.
How to Adjust Efficiently:
- Use a Clutch or Twist-Lock Mechanism: Most mic stands have a quick-release clutch or twist-lock system—grip, adjust, and lock it in place within seconds.
- Preset Common Heights: If multiple performers share a mic, mark optimal height positions with tape for easy adjustments.
- Check Stability Before Performing: Ensure the base is secure, and the mic angle is locked to prevent last-minute slips or unwanted movement.
- Avoid Over-Tightening Joints: Too much pressure can make on-the-spot adjustments harder and wear down the stand’s components over time.
Adjustable Mic Stand Producers in the Market

Evolving with changes of the performers is a key factor in becoming one of the top brands in the market. After all, no brand would like to go out of business.
Such brands which have stood the test of time to emerge as the best include:
They have produced excellent quality stands in various ranges to cater to a broader audience and support their needs. You can check out their site if you are looking for an adjustable microphone for your next performance.
Conclusion
Adjusting your mic stand properly ensures better sound clarity, reduces strain, and enhances overall performance. For standing vocalists, aligning the mic with mouth level prevents posture issues and improves projection. Seated performers benefit from lower positioning and boom arms to maintain a natural setup. Overhead placement works best for drummers and choirs, while tilted or side-angled adjustments allow greater mobility for multi-instrumentalists.
Quick-release mechanisms and preset height markers make live performance adjustments seamless, preventing disruptions on stage. Stability is key—secure bases and proper counterweights keep your setup reliable.
Mastering these mic stand adjustments eliminates the need for extra equipment, helping you get the most out of what you already have while achieving professional sound quality.
If you have liked reading the article so far, you can check out our other articles here: